さて、何事にも設計が必要なので簡単に設計図を書きました。
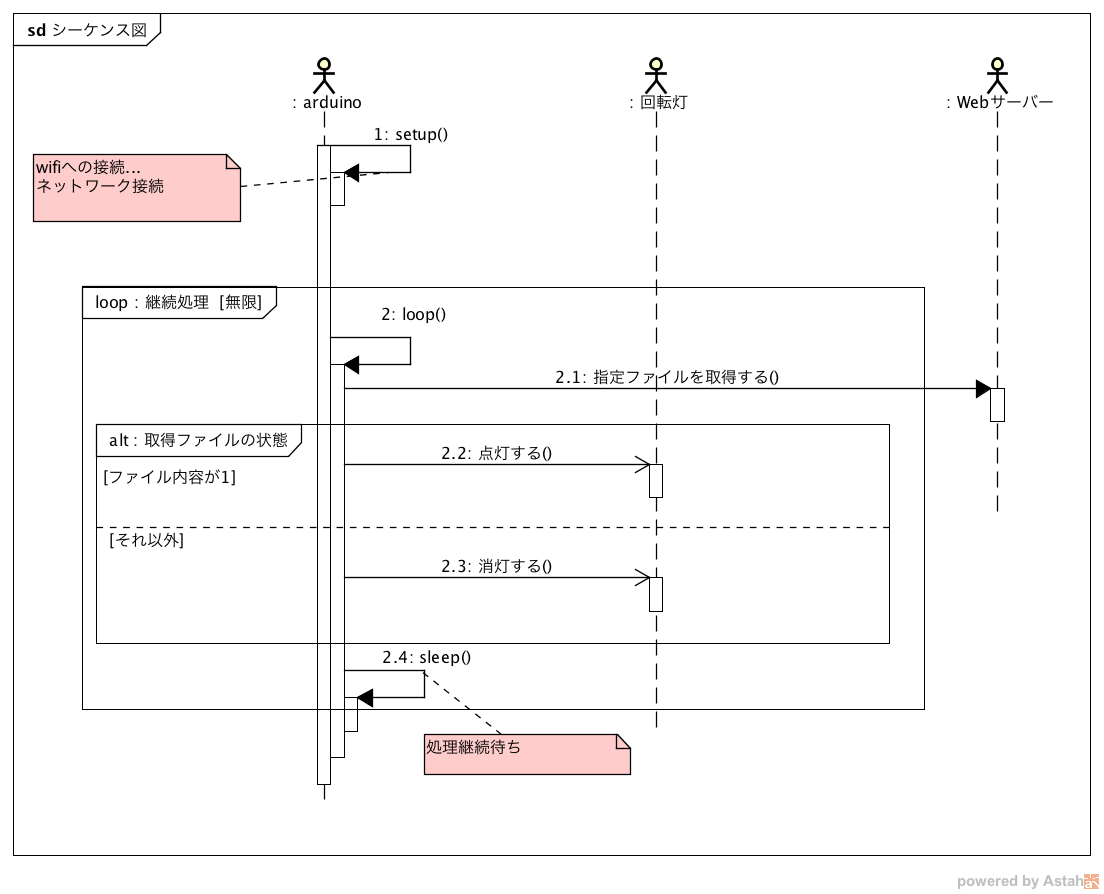
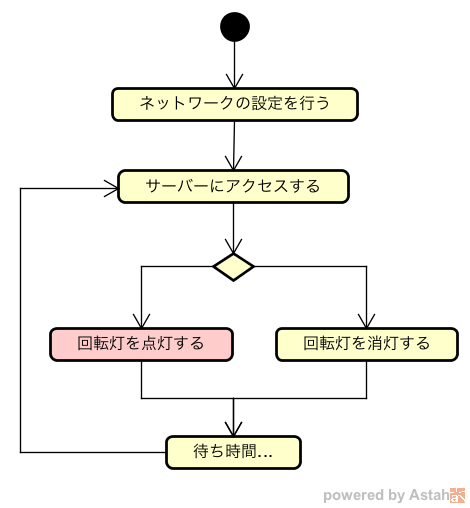
超シンプルですね。
結局のところ、起動時にネット接続を行って、サーバーにアクセス。結果が1だったら回転灯をくるくるさせる。
ってだけの動きです。
そして、arduino IDEのスケッチ例で取得できる。ソースです。
/* * This sketch sends data via HTTP GET requests to data.sparkfun.com service. * * You need to get streamId and privateKey at data.sparkfun.com and paste them * below. Or just customize this script to talk to other HTTP servers. * */ #include <ESP8266WiFi.h> const char* ssid = "your-ssid"; const char* password = "your-password"; const char* host = "data.sparkfun.com"; const char* streamId = "...................."; const char* privateKey = "...................."; void setup() { Serial.begin(115200); delay(10); // We start by connecting to a WiFi network Serial.println(); Serial.println(); Serial.print("Connecting to "); Serial.println(ssid); WiFi.begin(ssid, password); while (WiFi.status() != WL_CONNECTED) { delay(500); Serial.print("."); } Serial.println(""); Serial.println("WiFi connected"); Serial.println("IP address: "); Serial.println(WiFi.localIP()); } int value = 0; void loop() { delay(5000); ++value; Serial.print("connecting to "); Serial.println(host); // Use WiFiClient class to create TCP connections WiFiClient client; const int httpPort = 80; if (!client.connect(host, httpPort)) { Serial.println("connection failed"); return; } // We now create a URI for the request String url = "/input/"; url += streamId; url += "?private_key="; url += privateKey; url += "&value="; url += value; Serial.print("Requesting URL: "); Serial.println(url); // This will send the request to the server client.print(String("GET ") + url + " HTTP/1.1\r\n" + "Host: " + host + "\r\n" + "Connection: close\r\n\r\n"); unsigned long timeout = millis(); while (client.available() == 0) { if (millis() - timeout > 5000) { Serial.println(">>> Client Timeout !"); client.stop(); return; } } // Read all the lines of the reply from server and print them to Serial while(client.available()){ String line = client.readStringUntil('\r'); Serial.print(line); } Serial.println(); Serial.println("closing connection"); }読んだら分かりますが、これだけでプログラムは終わっていますね…
このスケッチを参考にプログラムを作ってみる。
点灯・消灯はファイルをupload / deleteで判断させようかな。
ファイルは下のurlを参照させるとする。
http://www.mmpp.org/service/revolvinglight/lightざっぽりコンパイルだけ通したソースがこちら
/* * This sketch sends data via HTTP GET requests to data.sparkfun.com service. * * You need to get streamId and privateKey at data.sparkfun.com and paste them * below. Or just customize this script to talk to other HTTP servers. * */ #include <ESP8266WiFi.h> #define LIGHT_PIN 13 const char* ssid = "********"; const char* password = "*********"; const char* host = "www.mmpp.org"; void setup() { Serial.begin(115200); delay(10); // 回転灯の制御pinを出力にする。 pinMode(LIGHT_PIN, OUTPUT); // We start by connecting to a WiFi network Serial.println("\n"); Serial.print("Connecting to "); Serial.println(ssid); WiFi.begin(ssid, password); while (WiFi.status() != WL_CONNECTED) { delay(500); Serial.print("."); } Serial.println(""); Serial.println("WiFi connected"); Serial.println("IP address: "); Serial.println(WiFi.localIP()); } void loop() { // 回転灯を点灯させるかの判断フラグ boolean turnOn = false; delay(5000); Serial.print("connecting to "); Serial.println(host); // Use WiFiClient class to create TCP connections WiFiClient client; if (!client.connect(host, 80)) { Serial.println("connection failed"); return; } // We now create a URI for the request String url = "/service/revolvinglight/light"; Serial.print("Requesting URL: "); Serial.println(url); // This will send the request to the server client.print(String("GET ") + url + " HTTP/1.1\r\n" + "Host: " + host + "\r\n" + "Connection: close\r\n\r\n"); unsigned long timeout = millis(); while (client.available() == 0) { if (millis() - timeout > 5000) { Serial.println(">>> Client Timeout !"); client.stop(); return; } } // Read all the lines of the reply from server and print them to Serial while(client.available()){ String line = client.readStringUntil('\r'); Serial.print(line); if(line.equals("1")){ turnOn = true; } } Serial.println(); Serial.println("closing connection"); if(turnOn){ // 点灯処理 digitalWrite(LIGHT_PIN, HIGH); }else{ // 点灯処理 digitalWrite(LIGHT_PIN, LOW); } }むむむっ!
1の値が
前後に改行を含んでいると言われる…悩ましいが寝る!明日は休みだからちょっと考えられるな